 Pipe Industry Co., Ltd.")

48 series construction method
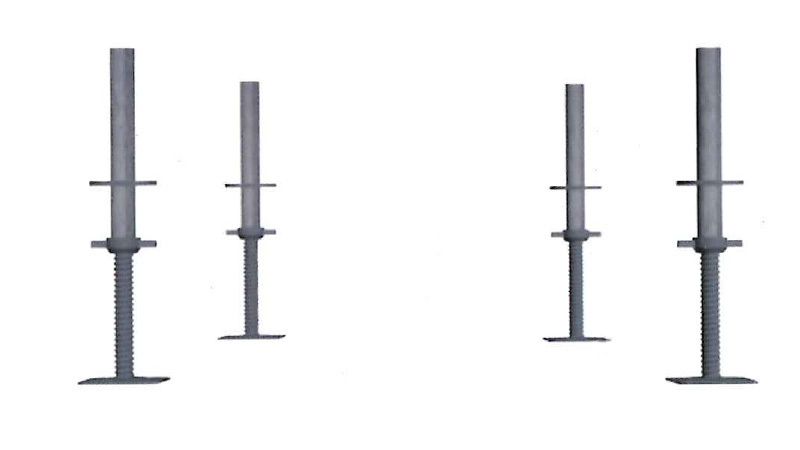
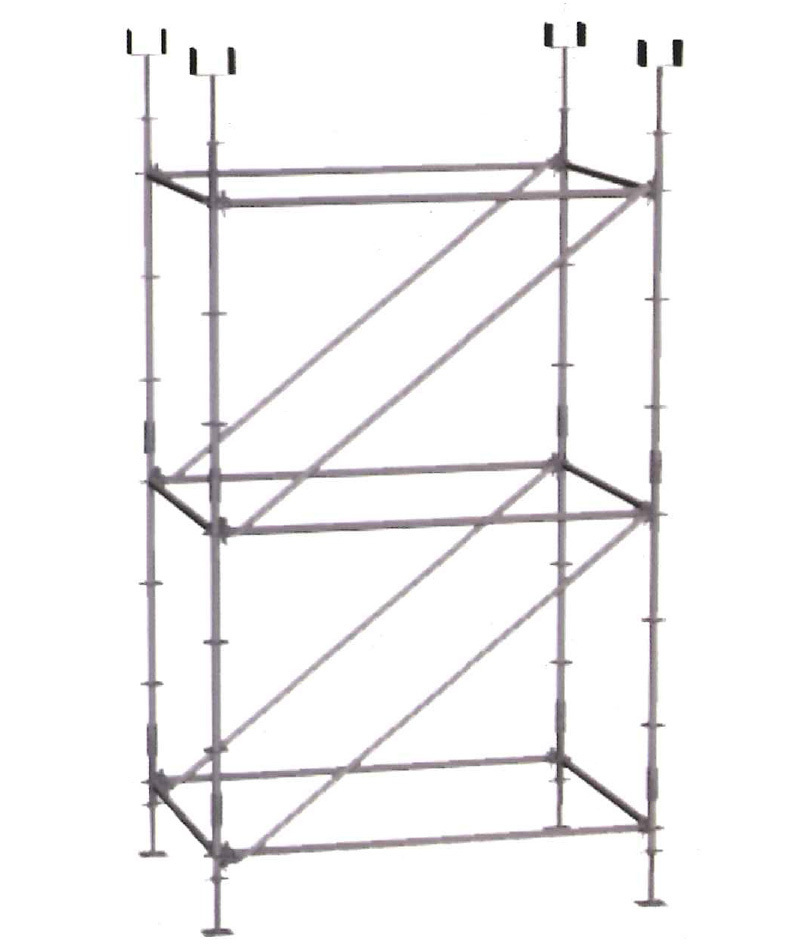
1. Under the care
After setting out according to the size of the scaffolding configuration diagram, arrange the 【Lower Support】to the fixed point.

2. Starting pole
Put the short end (150mm) of the [350mm starting pole] into the upper part of the adjustable base, and the lower edge is completely placed in the groove of the wrench force plane.
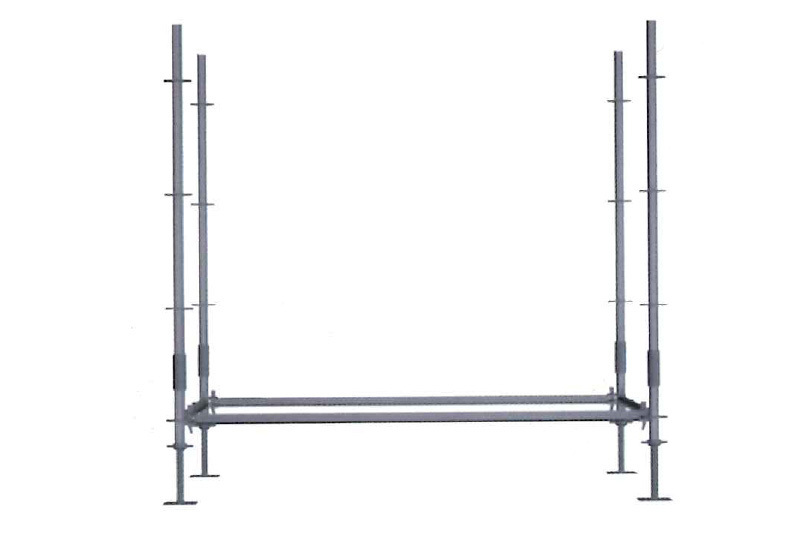
3. The first layer of crossbars
Put the two ends of the [crossbar] into the small hole position of the disc, so that the front section of the crossbar head is against the round tube of the vertical rod, and then use a wedge pin through the small hole to tap and fix it.

4. The first layer of poles
Put the [Pole] sleeve head down into the starting pole.
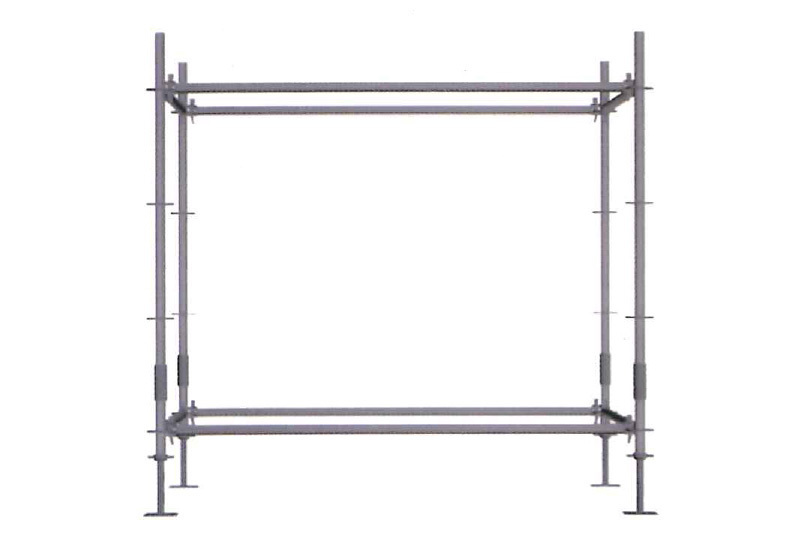
5. The second floor crossbar
Follow step 3 to install the second layer [crossbar].
6. The first layer of diagonal tie rods
Assemble all the [oblique pull rods] in a clockwise or all counterclockwise direction, and put the inclined rods into the position of the large hole of the disc, so that the front end of the inclined rod head is against the main frame round tube, and then tap the oblique wedge through the large hole. Fasten tightly.
(Note: The inclined rod is directional and cannot be built in the opposite direction)

7. The second layer of vertical poles and the third layer of horizontal poles are installed in accordance with the third and fourth steps.
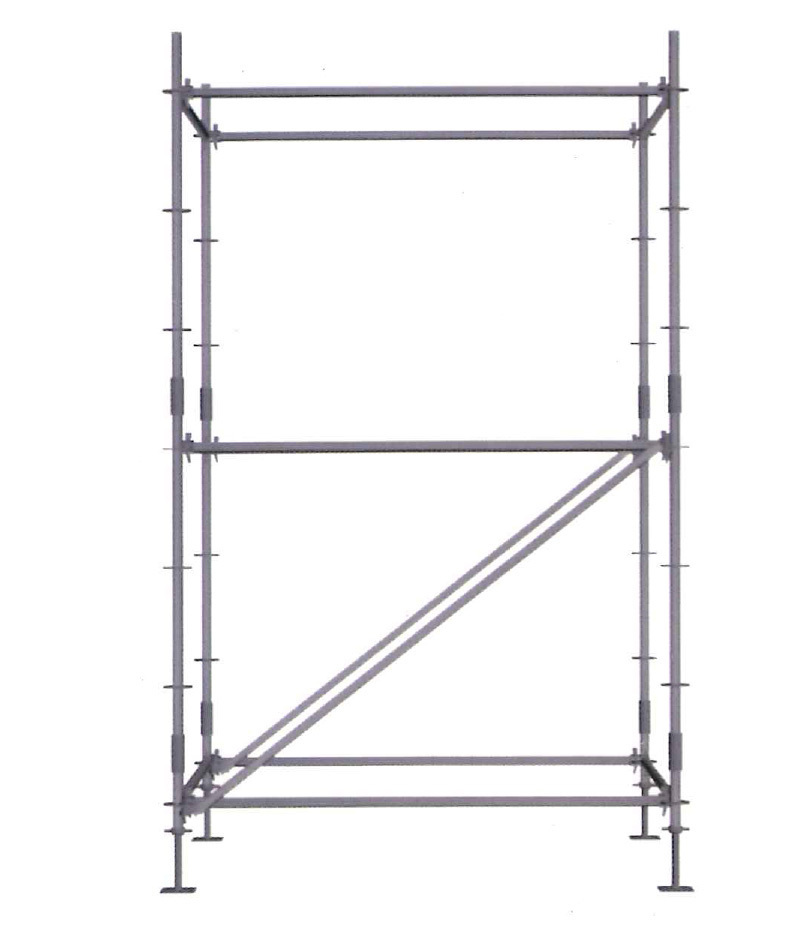
8. Top care
Insert the [upper bracket] dental tube into the vertical rod tube, and then adjust it to the desired height with a wrench.

Address:
Industrial Cluster Area, Qi County, Hebi City, Henan Province
Tel:
+86-392-6500228 +86-137-93116338
Mail:
Follow us


